Thursday, August 27, 2009

Daring Bakers Challenge #2

The August 2009 Daring Bakers' challenge was hosted by Angela of A Spoonful
of Sugar and Lorraine of Not Quite Nigella. They chose the spectacular Dobos
Torte based on a recipe from Rick Rodgers' cookbook Kaffeehaus: Exquisite
Desserts from the Classic Caffés of Vienna, Budapest, and Prague.

The Dobos Torta is a five-layer sponge cake, filled with a rich chocolate buttercream and topped with thin wedges of caramel. (You may come across recipes which have anywhere between six and 12 layers of cake; there are numerous family variations!) It was invented in 1885 by József C. Dobos, a Hungarian baker, and it rapidly became famous throughout Europe for both its extraordinary taste and its keeping properties. The recipe was a secret until Dobos retired in 1906 and gave the recipe to the Budapest Confectioners' and Gingerbread Makers' Chamber of Industry, providing that every member of the chamber can use it freely.


I was REALLY REALLY nervous making this one.
I had a slight issue with the sponge cake and I actually was short 1 layer because of said issues with working with the warmed cakes getting stuck to the parchment paper.
I think it turned out well, though there was some swearing involved. This is defintely something to break out when you need to impress people.
Note. All pictures in this post are my own.

Note this is a L-O-N-G recipe and is best done over at least 2 days so you don't feel crazy pressure.

Equipment

•2 baking sheets
•9” (23cm) springform tin and 8” cake tin, for templates
•mixing bowls (1 medium, 1 large)
•a sieve
•a double boiler (a large saucepan plus a large heat-proof mixing bowl which fits snugly over the top of the pan)
•a small saucepan
•a whisk (you could use a balloon whisk for the entire cake, but an electric hand whisk or stand mixer will make life much easier)
•metal offset spatula
•sharp knife
•a 7 1/2” cardboard cake round, or just build cake on the base of a sprinfrom tin.
•piping bag and tip, optional
Prep times

Sponge layers
20 mins prep, 40 mins cooking total if baking each layer individually.
•Buttercream: 20 mins cooking. Cooling time for buttercream: about 1 hour plus 10 minutes after this to beat and divide.
•Caramel layer: 10-15 minutes.
•Assembly of whole cake: 20 minutes

Sponge cake layers

•6 large eggs, separated, at room temperature
•1 1/3 cups (162g) confectioner's (icing) sugar, divided
•1 teaspoon (5ml) vanilla extract
•1 cup plus 2 tablespoons (112g) sifted cake flour (SUBSTITUTE 95g plain flour + 17g cornflour (cornstarch) sifted together)
•pinch of salt

Chocolate Buttercream

•4 large eggs, at room temperature
•1 cup (200g) caster (ultrafine or superfine white) sugar
•4oz (110g) bakers chocolate or your favourite dark chocolate, finely chopped
•2 sticks plus 2 tablespoons (250g) unsalted butter, at room temperature.

Caramel topping

•1 cup (200g) caster (superfine or ultrafine white) sugar
•12 tablespoons (180 ml) water
•8 teaspoons (40 ml) lemon juice
•1 tablespoon neutral oil (e.g. grapeseed, rice bran, sunflower)
Finishing touches

•a 7” cardboard round
•12 whole hazelnuts, peeled and toasted
•½ cup (50g) peeled and finely chopped hazelnuts

Directions for the sponge layers:

NB. The sponge layers can be prepared in advance and stored interleaved with parchment and well-wrapped in the fridge overnight.

1.Position the racks in the top and centre thirds of the oven and heat to 400F (200C).
2.Cut six pieces of parchment paper to fit the baking sheets. Using the bottom of a 9" (23cm) springform tin as a template and a dark pencil or a pen, trace a circle on each of the papers, and turn them over (the circle should be visible from the other side, so that the graphite or ink doesn't touch the cake batter.)
3.Beat the egg yolks, 2/3 cup (81g) of the confectioner's (icing) sugar, and the vanilla in a medium bowl with a mixer on high speed until the mixture is thick, pale yellow and forms a thick ribbon when the beaters are lifted a few inches above the batter, about 3 minutes. (You can do this step with a balloon whisk if you don't have a mixer.)
4. In another bowl, using clean beaters, beat the egg whites until soft peaks form. Gradually beat in the remaining 2/3 cup (81g) of confectioner's (icing)sugar until the whites form stiff, shiny peaks. Using a large rubber spatula, stir about 1/4 of the beaten whites into the egg yolk mixture, then fold in the remainder, leaving a few wisps of white visible. Combine the flour and salt. Sift half the flour over the eggs, and fold in; repeat with the remaining flour.

5. Line one of the baking sheets with a circle-marked paper. Using a small offset spatula, spread about 3/4cup of the batter in an even layer, filling in the traced circle on one baking sheet.

Bake on the top rack for 5 minutes, until the cake springs back when pressed gently in the centre and the edges are lightly browned. While this cake bakes, repeat the process on the other baking sheet, placing it on the centre rack. When the first cake is done, move the second cake to the top rack. Invert the first cake onto a flat surface and carefully peel off the paper. Slide the cake layer back onto the paper and let stand until cool. Rinse the baking sheet under cold running water to cool, and dry it before lining with another parchment. Continue with the remaining papers and batter to make a total of six layers. Completely cool the layers. Using an 8" springform pan bottom or plate as a template, trim each cake layer into a neat round. (A small serrated knife is best for this task.)


Directions for the chocolate buttercream:
NB. This can be prepared in advance and kept chilled until required.

1.Prepare a double-boiler: quarter-fill a large saucepan with water and bring it to a boil.
2.Meanwhile, whisk the eggs with the sugar until pale and thickened, about five minutes. You can use a balloon whisk or electric hand mixer for this.
3.Fit bowl over the boiling water in the saucepan (water should not touch bowl) and lower the heat to a brisk simmer. Cook the egg mixture, whisking constantly, for 2-3 minutes until you see it starting to thicken a bit. Whisk in the finely chopped chocolate and cook, stirring, for a further 2-3 minutes.
4.Scrape the chocolate mixture into a medium bowl and leave to cool to room temperature. It should be quite thick and sticky in consistency.
5.When cool, beat in the soft butter, a small piece (about 2 tablespoons/30g) at a time. An electric hand mixer is great here, but it is possible to beat the butter in with a spatula if it is soft enough. You should end up with a thick, velvety chocolate buttercream. Chill while you make the caramel topping.

Lorraine's note: If you're in Winter just now your butter might not soften enough at room temperature, which leads to lumps forming in the buttercream. Male sure the butter is of a very soft texture I.e. running a knife through it will provide little resistance, before you try to beat it into the chocolate mixture. Also, if you beat the butter in while the chocolate mixture is hot you'll end up with more of a ganache than a buttercream!

Directions for the caramel topping:

1.Choose the best-looking cake layer for the caramel top. To make the caramel topping: Line a jellyroll pan with parchment paper and butter the paper. Place the reserved cake layer on the paper. Score the cake into 12 equal wedges. Lightly oil a thin, sharp knife and an offset metal spatula.
2.Stir the sugar, water and lemon juice in a small saucepan. Bring to a boil over a medium heat, stirring often to dissolve the sugar.
Once dissolved into a smooth syrup, turn the heat up to high and boil without stirring, swirling the pan by the handle occasionally and washing down any sugar crystals on the sides of the pan with a wet brush until the syrup has turned into an amber-coloured caramel.

3.The top layer is perhaps the hardest part of the whole cake so make sure you have a oiled, hot offset spatula ready. I also find it helps if the cake layer hasn't just been taken out of the refrigerator. I made mine ahead of time and the cake layer was cold and the toffee set very, very quickly—too quickly for me to spread it. Immediately pour all of the hot caramel over the cake layer. You will have some leftover most probably but more is better than less and you can always make nice toffee pattern using the extra to decorate. Using the offset spatula, quickly spread the caramel evenly to the edge of the cake layer.
Let cool until beginning to set, about 30 seconds. Using the tip of the hot oiled knife (keep re-oiling this with a pastry brush between cutting), cut through the scored marks to divide the caramel layer into 12 equal wedges. Cool another minute or so, then use the edge of the knife to completely cut and separate the wedges using one firm slice movement (rather than rocking back and forth which may produce toffee strands). Cool completely.

Angela's note: I recommend cutting, rather than scoring, the cake layer into wedges before covering in caramel (reform them into a round). If you have an 8” silicon round form, then I highly recommend placing the wedges in that for easy removal later and it also ensures that the caramel stays on the cake layer. Once set, use a very sharp knife to separate the wedges.


Assembling the Dobos

1.Divide the buttercream into six equal parts.
2.Place a dab of chocolate buttercream on the middle of a 7 1/2” cardboard round and top with one cake layer. Spread the layer with one part of the chocolate icing. Repeat with 4 more cake layers. Spread the remaining icing on the sides of the cake.
3.Optional: press the finely chopped hazelnuts onto the sides of the cake.
4.Propping a hazelnut under each wedge so that it sits at an angle, arrange the wedges on top of the cake in a spoke pattern. If you have any leftover buttercream, you can pipe rosettes under each hazelnut or a large rosette in the centre of the cake. Refrigerate the cake under a cake dome until the icing is set, about 2 hours. Let slices come to room temperature for the best possible flavour.


Tuesday, August 4, 2009

Book Club, July Review

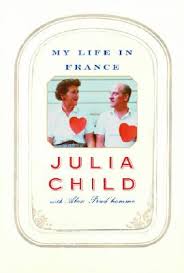
For July we read Julia Child's My life in France.


It was a lovely book about well her life in France and the making of her famous book , Mastering the Art of French Cooking. It was a great tiem for this book, considering the buzz about the movie Julie and Julia. It goes through how she met her huband Paul and their travels that came with the positions in government they had. You get to read in basically her own words the awakening that Julia had when they moved to France and how it inspired her to try cooking and how it forever changed her life with the trials of Mastering the Art of French Cooking.

The Book Club post about it is here
http://mllenoelle.wordpress.com/2009/07/26/book-club-my-life-in-france-by-julia-child/


Here are the Disscussion Questions and my answers. If you've read the book feel free to post your own answers.

1. Julia’s first meal in France (Sole Meunière) was transformative. She recalls it in the book with great detail, calling it “the most exciting meal of my life”. Do you have any one meal that stands out in your memory like this? Was it simply because the food was exquisite, or is it tied to another experience that made it particularly special?

Maybe not quite the same as Julia's experience but food wise my most stand out moment is when my now husband took me out to a fancy dinner place on a dateI was 17. We decided to order some steaks to go all out. They asked how I liked it cooked and I had no clue since all meat was cooked well done at my house. They said medium rare is popular so I decided to try it. OMG it was amazing. I've never gone back to well cooked beef ever again. I didn't realize beef could be so juicy and tender and melty (is that even a word? LOL)

2. Nowadays, with the popularity of celebrity chefs such as Rachel Ray touting “30-minute meals”, is Julia Child obsolete? Do you think people care anymore about the art of cooking and making something truly oustanding, or are most people looking for the “quick fix”? Where do you fall on the spectrum, and why?

Honestly it all depends, on a day to day basis I like things that quick and easy, or at least where you can do all the prep ahead of time and just pull it out of the fridge to put it together. For familu dinners and speical occasions I will defintely take my time and turn out something amazing. I would love to be more towards Julia's style but with having little kids I cannot be serving dinner anytime past 6 or the crankiness distroys my house.

3. For several years, Julia spent enormous amounts of time and energy writing the cookbook that would become Mastering the Art of French Cooking, despite having no assurances that the book would ever be published. Can you imagine undertaking such an enormous endeavor, not knowing if your efforts would ever bear fruit? Do you feel that this type of dedication is a vanishing quality in our society, or have you or someone you know ever undertaken a similar project not knowing whether there would be a payoff?

I couldn't imagine doing something like this. I'm having a hard time knowing I need to go back to school and what to do about that. I'm sure that while it would have been upsetting if MtAoFC didn't getting published like it did, Julie would have just said ok looked elsewhere and continued on. She was always saying in the book that she was doing it for her own research as much as for the book.

4. Julia describes her father and stepmother as being somewhat small-minded and not at all interested in “experiencing” France in the way she did. Her father’s conservative attitude was a constant source of chagrin for her, and she never felt close to him because of it. Do you feel she should have made more of an effort, or was she right to give up on him and keep her distance? Why do you think her father was threatened by Julia’s choice of husband and lifestyle?

I think she did ok. If her and Paul had to hide who they were from her father and step-mom just to have a good relationship with them, how is that a good relationship. Its sad but even though you have close bloodties with someone doesn't mean that your lives are going to be anywhere near following the same paths. No one needs toxic people in their lives and its hard to let go.

5. The memoir covers several periods in Julia’s life, from the time she arrives in France to her later years at La Pitchoune. What was your favorite part of the book or of Julia’s story, and why?

My favourite was when she started at the Cordon Blue. Her relationship with her teacher-chef was amazing. To be able to have someone who knows so much about the food and markets, and to be willing to give extra help and studies blows my mind. To read about the awakening she had once she was getting the hang of things was great. Makes me want to go to Paris and forget the tourist stuff.

Monday, July 27, 2009

Daring Baker's Challenge #1

The July Daring Baker's Challenge was hosted by Nicole at SweetTooth. She chose Chocolate Covered Marshmallow Cookies and Milan Cookies from pastry chef Gale Gand of the Food Network.

I tried to do both and while the Milan cookies turned out quite easy the Mallows were a whole other ball game.
Milan Cookies.
Prep time: 20 Mins
Inactive Prep Time: 0 mins
Cook Time: 1 hour
Serves about 3 dz.
  • 12 tablespoons unsalted butter
  • 2 1/2 cups powdered sugar
  • 7/8 cup egg whites (from about 6 eggs)
  • 2 tablespoons vanilla extract
  • 2 tablespoons lemon extract
  • 1 1/2 cup all purpose flour
  • Cooking filling, recipe below

Cooking Filling

  • 1/2 cup heavy cream
  • 8ounces semisweet chocolate, chopped
  • 1 orange, zested
In a mixer with paddle attachment cream the butter and sugar.\
  1. Add the egg whites gradually and then mix in the vanilla and lemon extracts.
  2. Add the flour and mix until just well mixed.
  3. With a small (1/4 inch) plain piping tip, pipe 1-inch sections of batter onto a parchment or silicon lined baking tray, spacing them 2 inches apart as they will spread.
  4. Bake in a preheated 350 degree oven for 10 minutes or until light golden brown around the edges, Let cool on the pan.
  5. While waiting for the cookies to cool, in a small saucepan over medium heat scald cream,
  6. Pour hot cream over chocolate in a bowl, whisk to melt chocolate, add zest and blend well.
  7. Set aside to cool (mixture will thicken as it cools).
  8. Spread a thin amount of the filling onto the flat side of a cookie while the filling is still soft and press the flat side of a second cookie on top.
  9. Repeat with the remainder of the cookies.


These there was very little issues with but the cookie part never got as crispy as I would have liked, but the taste more than made up for that.


Clearly the boys enjoyed the chocolate part the most.

Mallows (Chocolate Cover Marshmallow Cookies)
Prep Time: 10 min
Inactive Prep Time: 5 min
Cook Time: 10 mins
Serves about 2 dozen
  • 3 cups all purpose flour
  • 1/2 cup white sugar
  • 1/2 teaspoon salt
  • 3/8 teaspoon baking powder
  • 1/2 teaspoon ground cinnamon
  • 12 tablespoons unsalted butter
  • 3 eggs, whisked together
  • Homemade Marshmallows, recipe follows
  • Chocolate glaze, recipe follows
  1. In a mixer with the paddle attachment, blend the dry ingredients
  2. On low speed, add the butter and mix until sandy
  3. Add the eggs and mix until combine
  4. Form the dough into a disk, wrap with clingfilm or parchment and refrigerate at least 1 hour and up to 3 days.
  5. When ready to bake, grease a cookie sheet or line it with parchment paper or a silicon mat.
  6. Preheat the oven to 375 degrees F
  7. Roll out the dough to 1/8- inch thickness, on a lightly floured surface. Use a 1 to 1 1/2 inch cookie cutter to cut out small rounds of dough.
  8. Transfer to the prepared pan and bake for 10 minutes or until lightly golden brown. Let cook to room temperature.
  9. Pipe a "kiss"of marshmallow onto each cookie. Let set at room temperature for 2 hours.
  10. Line a cookie sheet with parchment or silicon mat.
  11. One at a time, gently drop the marshmallow-topped cookies into the hot chocolate glaze.
  12. Lift out with a fork and let excess drip back into the bowl.
  13. Place on the prepared pan and let set at room temperature until the coating is firm, about 1 to 2 hours.
Note: if you don't want to make your own marshmallows you can cut a large marshmallow in half and place on the cookie base. Heat in a preheated 350 degree oven to slump the marshmallow slightly. It will brown a little and expand. Let cool and the proceed with the chocolate dipping.
Homemade Marshmallows
  • 1/4 cup water
  • 1/4 cup light corn syrup
  • 3/4 cup sugar
  • 1 tablespoon powdered gelatin
  • 2 tablespoons cold water
  • 2 egg whites, room temperature
  • 1/4 teaspoon pure vanilla extract
  1. In a saucepan, combine the water, corn syrup, and sugar, bring to a boil until "softball" stage or 235 degrees on a candy thermometer.
  2. Sprinkle the gelatin over the cold water and let dissolve.
  3. Remove the syrup from the heat, add the gelatin and mix.
  4. Whip the whites until soft peaks form and pour the syrup into the whites.
  5. Add the vanilla and continue to whip until stiff.
  6. Transfer to a pastry bag.
Chocolate Glaze
  • 12 ounces semisweet chocolate
  • 2 ounces cocoa butter or vegetable oil
  1. Melt the 2 ingredients together in the top of a double boiler or a bowl set over barely simmering water.
I had quite the issue with this one. The cookie bases were great and easy. Thought it needs to be noted that the amounts the various parts make are off. I got easily 50-60 cookies from the recipe and the marshmallows I got about 40 from and the chocolate barely did 24. My main issue was the marshmallows. I had a hard time getting mine stiff so I ended up just putting them into a cornstarch and saran wrapped dish and let it set that way. I then just used the same cookie cutter from the cookies to cut out the marshmallows. My other issue was that I wasn't being careful and watching my chocolate close enough and therefore it got to hot and started melting my marshmallows. Once I started paying proper attention they came out fine.

The completed Mallow

The inside

Tuesday, July 14, 2009

I didn't forget you.

The weather just hasn't been the best for baking. Its cooled down this week so I've already gotten back into it.
I made some banana bread this afternoon. And the husband totally reminded me that I should the zucchinis that we got from his parents and maybe a bread with that too. Pictures to come!

Thursday, July 2, 2009

Hungry Monkey

I recently joined a Foodie Book Club.

For June we read the book Hungry Monkey. I know the title of the post gives it all away.

Its about food writer/restaurant reviewer Matthew Amster-Burton and his daughter Iris. Its the record of his drive and attempts for his daughter to enjoy food as much as he does. I really enjoyed the book. I have a picky eater on my hands with my oldest son, and it was entertaining and nice to see that now all kids bawk at the idea of most foods placed on the table. I kept reading some of the authors one-liners to my husband cause he kept asking why I was giggling.
Here are my answers. The question can be found at the above link.


1. Both the author and myself had some pre-conceieved notions about picky eaters. Did the book change any views you may have had or (for those of you who are parents) reinforce what you already knew to be true from experience?

I remember clearly always saying that I didn't want food to really be an issue in my house. I fully thought that I would be able to make meals and my kids would eat them. We did really well for the first year (6 months to 18 months) and then the pickiness started to show with my oldest. Food became an issue and it started to really affect me and over time I realized that this too will pass. I grew up hating some veg and as an adult I love them. Sometimes it all depends on how it was cooked and served.

2. The author confesses that he was, in fact, a very picky eater as a child, but turned out to be an avid food lover. Most of you reading this are probably adventerous eaters; is this something that you came to on your own, or did your parents nudge you in that direction? Do you think being a "food lover" is innate or learned?

I fully believed its learned. I'm 27 and I'm still having issues with some foods. I hate the texture of most seafood. Sushi, the nori makes me gag. I'm taking way more chances now than I did growing up but than again maybe thats because growing up we were a steak and mashed pototoes family. If we go out for dinner, for say Thai, my mom gets the most american/canadian style food item on the menu. Its also said that it takes upwards of 20 times of putting a new food infront of some kids for them to be willing to try it.

3. The author describes being forced to try sushi as a kid and almost throwing up, but trying it again in college and loving it. He credits this to the fact that the secong he tried it, he expected to like it. Do you agree? Can you think of a food that you probably liked because you expected to like it, or anything you didn't like in spite of thinking you would?

I competely agree. There are many things in life, food being the one of the main ones, that if you think your not going to like it you won't. If you don't have an open mind to trying out things then of course your palate is going to be limited because you haven't pushed yourself to try. Food and eating is about way more than taste and its a visual experience first. If you don't like the looks of things then usually you've convinced yourself its going to taste bad as well.

4. Not every family can spend the time and money the author does to introduce his daughter to so many foods. What can working parents or parents with less means do to bring cooking and diverse foods into the children's lives? Or do you feel this is even important?

This is really important. You spend your kid's childhood showing him/her the world and the wonders it holds. Food is one of them. I still struggle as to how to share this passion with my children since they are young themselves (2 and 4). But introducing them to things doesn't have to be some of the fancy or exotic foods Matthew brought home. My kids are thrilled to roll out cookie dough, to help load the slow cooker. Just asking them to help pick a vegtable from the market or the grocery store could make them more likely to try something new (we're still working on this one at home).

5. Food obviously plays a huge role in the Amster-Burton household. What role does food have in your household? Do you feel that kids need to know "where food comes from" and participate in food preparation, or is it enought just to make sure they're eating resonably healthy foods?

I do think its important that kids know where food comes from. I like the fact that my 4 year old knows that beef comes from cows, like you see in the fields, flour comes from wheat. Children are very curious by nature and I fully believe in helping my kids learn as much as their curiosity needs. We've tried dragonfruit that we've seen at the grocery store cause my kids were questioning it, they were not huge fans of it, but they were initally eager to try. My children love Christmas time because I go nuts with baking. Rolling out the sugar cookies is something they battle over. Even though my oldest is a picky eater hes still curious about food things, hopefully like the author this will mean he has a good chance of being a avid food lover as he gets older.

Wednesday, June 17, 2009

mmm... fakey goodness.

What do you get when you make
cupcakes
Brownies
Sugar cookies
don't forget the icing and maybe throw in some coconut?
and mix them together?

?
?
?


Care to take a guess?


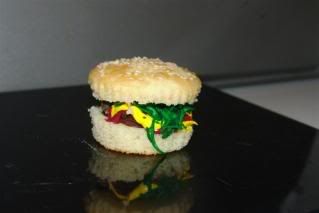
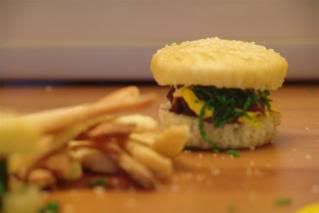
You get a brownie burger cupcake!
The Ketchup and Mustard are icing and the lettuce is coconut.
How frigging cute is that?

Here is the army of them before they were topped.

Don't forget your side of cookies!
Just a regular batch of sugar cookies rolled and cut into fry stripes.


Sunday, June 7, 2009

He bakes!

Obviously my husband is enjoying the baking of this house. He's even gotten into it himself. I recently acquired a Gordan Ramsey cookbook.


Only I got it for 50% off. Seriously I have such an addiction to cookbooks that I bought this because I fell in love with 1-2 recipes inside(which I will make and post about soon, Promise). My Bookcase is buckling under the weigh of these books.

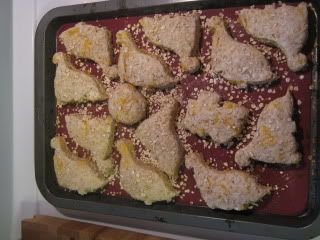
Anyways Tom saw a recipe for Oaty Walnut and Cheese Biscuits.
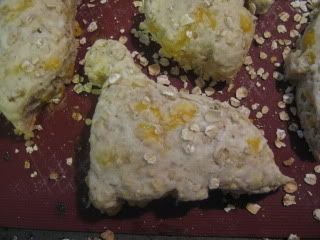
So him and our oldest made them the other day. And of course since a 4 year old was involved, the outcome was cute.


That's right its dinosaurs! These were great, everyone who tried them said yummy things. Though I think when I make them next I'm gonna play with it a bit. They do seem a tad plain and well we are not.